Step-by-step guide to drawing a mandala: It’s so easy!
Drawing mandalas is a relaxing and creative activity that promotes concentration and patience. There are countless ways to draw a mandala. Here’s one method. From creating the basic structure to adding intricate details, this guide will help you design a harmonious and symmetrical artwork.

You will need these materials:
- Paper, either smooth copy paper like Clairefontaine DCP or Bristol Paper
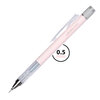
- Pencil, such as the MONO graph
- Pair of compasses
- Set square
- Eraser, such as the MONO dust CATCH
- Fineliner (if you want to color your mandala later with watercolors, this should be waterproof! For example, the MONO twin)
Do you need more of this?
Step 1: Circle
We first draw a circle with the pair of compasses in the middle of the paper. From this central point, we simply change the radius and thus achieve rings of different widths.
In theory, you can begin filling these rings with color or various patterns now. But we want to make things more exciting.

Step 2: Baseline system
For this reason, we now draw a line through the center to the outermost rings with the set square. We will now orient ourselves to this line and, with the help of the set square, draw in large “slices of cake.”
How did we do that in math?
I usually settle for a 90° and then the 45° angles, so a total of eight slices of cake.

Step 3: Even more circles
There are now various points where our pencil lines intersect. We now use our pair of compasses once again. We select one of these intersections, e.g. one on the middle ring. We now draw a circle.
Basic symmetry is very important in mandalas. If this is the case, it doesn’t matter if a mistake slips in later with the details. It is therefore important that we copy this circle we have just drawn symmetrically throughout our work. So, in all eight cake slices or, if it is a larger circle, just in the quarters. There are no rules. The main thing is symmetry.
The more you have drawn in, the trickier it will be to always locate the right places.

Schritt 4: Details vom Zentrum aus hinzufügen
We now have the basic structure and numerous individual fields that can be adorned. The simplest thing is always to begin in the center.
Schritt 5: Symmetrie über Perfektion betonen
You can see here on the example image that I haven’t drawn very precisely, but it isn’t a problem. In the end, these irregularities won’t be noticeable. The important thing is to keep the overall symmetry in mind.
Schritt 6: Entwickeln und Ausmalen deines Mandalas
Allow yourself time. A beautiful mandala needs to grow. Experiment with free forms and also with hatches and patterns now and then. I often have to go back to the pair of compasses occasionally to fill gaps with additional supporting circles.
If you think your mandala is finished, erase the pencil sketches and consider a beautiful color scheme to color your artwork.
I like to do this with a brush and watercolor pens so that I can bring in subtle color transitions.
Done!
Let us know how helpful this article was for you. If you have any suggestions for improvement or other feedback, we’d love to hear from you. We promise to read everything.
PS: We're also curious to see your results. Share your work with us on Instagram or Facebook and share it with the community.


