Your own game of Ludo on the go
Wouldn't it be nice to have a game with you on your next visit to the park? Preferably something practical, without having to carry a whole box including a game board. Franzi from "Die Kunstliebe" shows you how to conjure up your own game of Ludo on the go with the MONO twin. Thanks to the jute bag, your game can also become a practical everyday companion.

You will need these materials for your own DIY game:
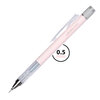
- Mechanical pencil such as the MONO graph
- Fineliner such as the MONO drawing pen size 01
- MONO twin marker
- Eraser such as the MONO dust CATCH
- Glue roller such as MONO Maxi Power Tape
- 16 figures - made from pebbles, for example
- 1 cloth bag in the size 38 x 42 cm made of 100 % cotton
- scissors
- Compasses or glass
- Thin sketch paper
- Dice
You still need some of it?
Step 1: The figure illustrations
First I sketch the figures with the MONO graph. The illustration for the starting area will be more detailed than the sketch for the smaller fields. To ensure that the animals are the same size, I draw an auxiliary circle as a boundary using a glass. You can also use a compass or simply draw freehand. My figures will be cute Indian animals. I prefer to use the MONO graph for sketching, as it's great to hold due to its weight, has HB thickness (and the new pastel colours are simply beautiful). Corrections are allowed, just erase the excess lines.

Step 2: The contours
I then trace the contours with the MONO drawing pen in size 1 (size 3 also works very well) and erase the excess lines. Tracing is necessary so that the lines can be seen through the fabric later.

Step 3: The playing field
There are now two options here:
You can simply print out our template and stick your figures onto it. The advantage here is that the individual squares are exactly the same distance apart. If you don't have this option, simply draw the squares yourself using a small round object, such as a coin or a bottle cap. I now cut out my large figures for the waiting area and stick them onto my template using MONO Maxi Power Tape. I copy the small figures for the small squares four times and cut them out so that they look identical for the smaller squares.

Step 4: To go please!
Now the template is ready and you can transfer your game to the bag. So it's always ready to use when you're out and about. I have centred the field and fixed it with 1-2 pins so that it doesn't slip.
The thin cotton fabric makes it easy to recognise the sketch. Now you can easily trace the contours with the MONO twin. It is waterproof and is particularly suitable for this. Firstly, the colour keeps its shape and does not "bleed" (this is very important). Secondly, it has two tips of different thicknesses: I like to draw the outlines of the figures and highlights with the thin tip and the playing fields and larger colouring areas with the thicker tip.
Done!
Let us know how helpful this article was for you when you tried it out. Feel free to send us a message if you have any suggestions for improvement or other feedback for us. We read everything, we promise.
PS: We are of course also curious about your result. Feel free to show us your work on Instagram or Facebook and share it with the community.


![[Translate to Englisch:] Zwei bunte Osterkarten in Form von aufgeklappten Boxen stehen auf einem Holztisch. Jede Box ist mit gezeichneten Osterhasen in bunten Farben und Papiergras verziert. Auf beiden Karten steht „Frohe Ostern“. Im Vordergrund liegen Filzstifte in Rosa, Blau und Schwarz.](/fileadmin/_processed_/2/5/csm_21_03_PopUpBox_Teaser_571c61b192.jpg)