Linking to the video streaming service is disabled to protect your privacy. Click here to activate it. By loading the video, you accept the privacy policy of the video streaming service. Further information about the privacy policy can be found here: Google - Privacy & Terms

You will need this material for the loose watercolouring style:
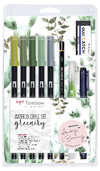
- Tombow Watercolor Set Greenery
- Aquarelle paper pad
Do you need more of this?
Step 1: Preparation
Apply the ABT Dual Brush Pen colors 312, 098, and 249 to your blending palette. In the process, use a flat angle underneath to transfer as much color as possible to the palette. In preparation for the next step, fill up your water brush.

Step 2: The treetop
With your wet water brush, take color from pen 312 from the blending palette and apply it to your watercolor paper. Start with three loose ovals placed together that look a little bit like clouds.

Step 3: Shadow for the treetop
Paint two additional fluffy ovals below the first ones. For a more interesting look, add the color 098 to the leaves. To do this, the first layer of color need not have dried out yet; both colors can blend into one another. This technique is also called washing.

Step 4: Sketch the trunk
While the treetop is drying, you can sketch the trunk with color N52. For this purpose, use the Brush Pen tip and only draw the outer lines of the trunk, including little branches, straight onto your watercolor paper.

Step 5: Color the trunk
With the water brush, you now blend the lines of the trunk that you have just drawn, thus achieving a consistent watercolor look. In the process, ensure that the outer edges stay somewhat darker to create an immediate shadow effect.

Step 6: Further shadow for the treetop
Take color 249 from your blending palette and give your treetop greater depth and contrast. Here, you apply the color as semicircular brush strokes across the lower portion of your ovals. Let your tree dry thoroughly.

Step 7: Decorations
Great details can be added with the MONO drawing pen. I trace short little strokes on the left side of the trunk to achieve a shadow effect. I also give the treetop little semicircular strokes for more structure. However, I do not fill in the whole treetop; I just suggest the leaf structure with little groups of strokes.
The result is a loose watercolor tree with black accents. You can also paint many other types of tree in a similar style. Be inspired by nature and try out new shapes and color combinations.


Done!
Let us know how helpful this article was for you. If you have any suggestions for improvement or other feedback, we’d love to hear from you. We promise to read everything.
PS: We're also curious to see your results. Share your work with us on Instagram or Facebook and share it with the community.